How to back up iPad photos to a USB drive without a computer
Yes, an iPad can back up its own photos and files to a USB drive or external SSD with no Mac or PC involved. Modern iPads have a USB-C port, so the drive connects directly: plug it in, confirm it appears in Files, choose what to back up, and copy the originals across.
Quick answer
Connect the drive to the iPad's USB-C port, check that it appears under Locations in the Files app, then use AmberTime to create a backup task from your Photo Library or a Files folder to a folder on that drive. AmberTime runs natively on iPad, keeps a record of what it has already copied, and transfers only new items on later runs.
Which iPads can do this
The deciding factor is the port, not the model year. Every iPad that runs iPadOS 17.6 or later can use AmberTime, but how you attach the drive differs.
| Port | iPads | What you need |
|---|---|---|
| USB-C | iPad Pro (2018 and later), iPad Air (4th generation and later), iPad mini (6th generation and later), iPad (10th generation and later) | A USB-C cable, or plug the SSD in directly. No adapter. |
| Lightning | Older iPads still on iPadOS 17.6, including iPad 6th–9th generation, iPad Air 3rd generation, iPad mini 5th generation, and the Lightning iPad Pro models | Apple's Lightning to USB 3 Camera Adapter, preferably with power connected. |
Bus-powered SSDs can draw more current than a tablet port supplies. If the drive does not mount, or it disconnects under load, connect it through a powered USB-C hub and try again.
Before you start
- Use an iPad running iPadOS 17.6 or later.
- Use a USB drive or external SSD that appears in the iPadOS Files app. If Files cannot see the drive, no app on the iPad can write to it.
- Check that the drive has enough free space for the photos and videos you plan to copy.
- For large videos, prefer APFS or exFAT. FAT32 has a 4 GB single-file limit that will skip long 4K and ProRes clips. See choosing a filesystem.
- If your library uses iCloud Photos with "Optimize iPad Storage", decide whether you want AmberTime to fetch iCloud-only originals from Apple before writing them.
Steps
-
Connect the drive
Plug the USB drive or external SSD into the iPad's USB-C port, then open the Files app and confirm the drive is listed under Locations. AmberTime writes to destinations that iPadOS exposes through Files, so this check comes first.
-
Create a backup task
Open AmberTime and create a new backup task. Choose Photo Library to back up photos, videos, and Live Photos, or Custom Directory to back up a folder from Files — scanned documents, downloads, or a project folder you work on from the iPad.
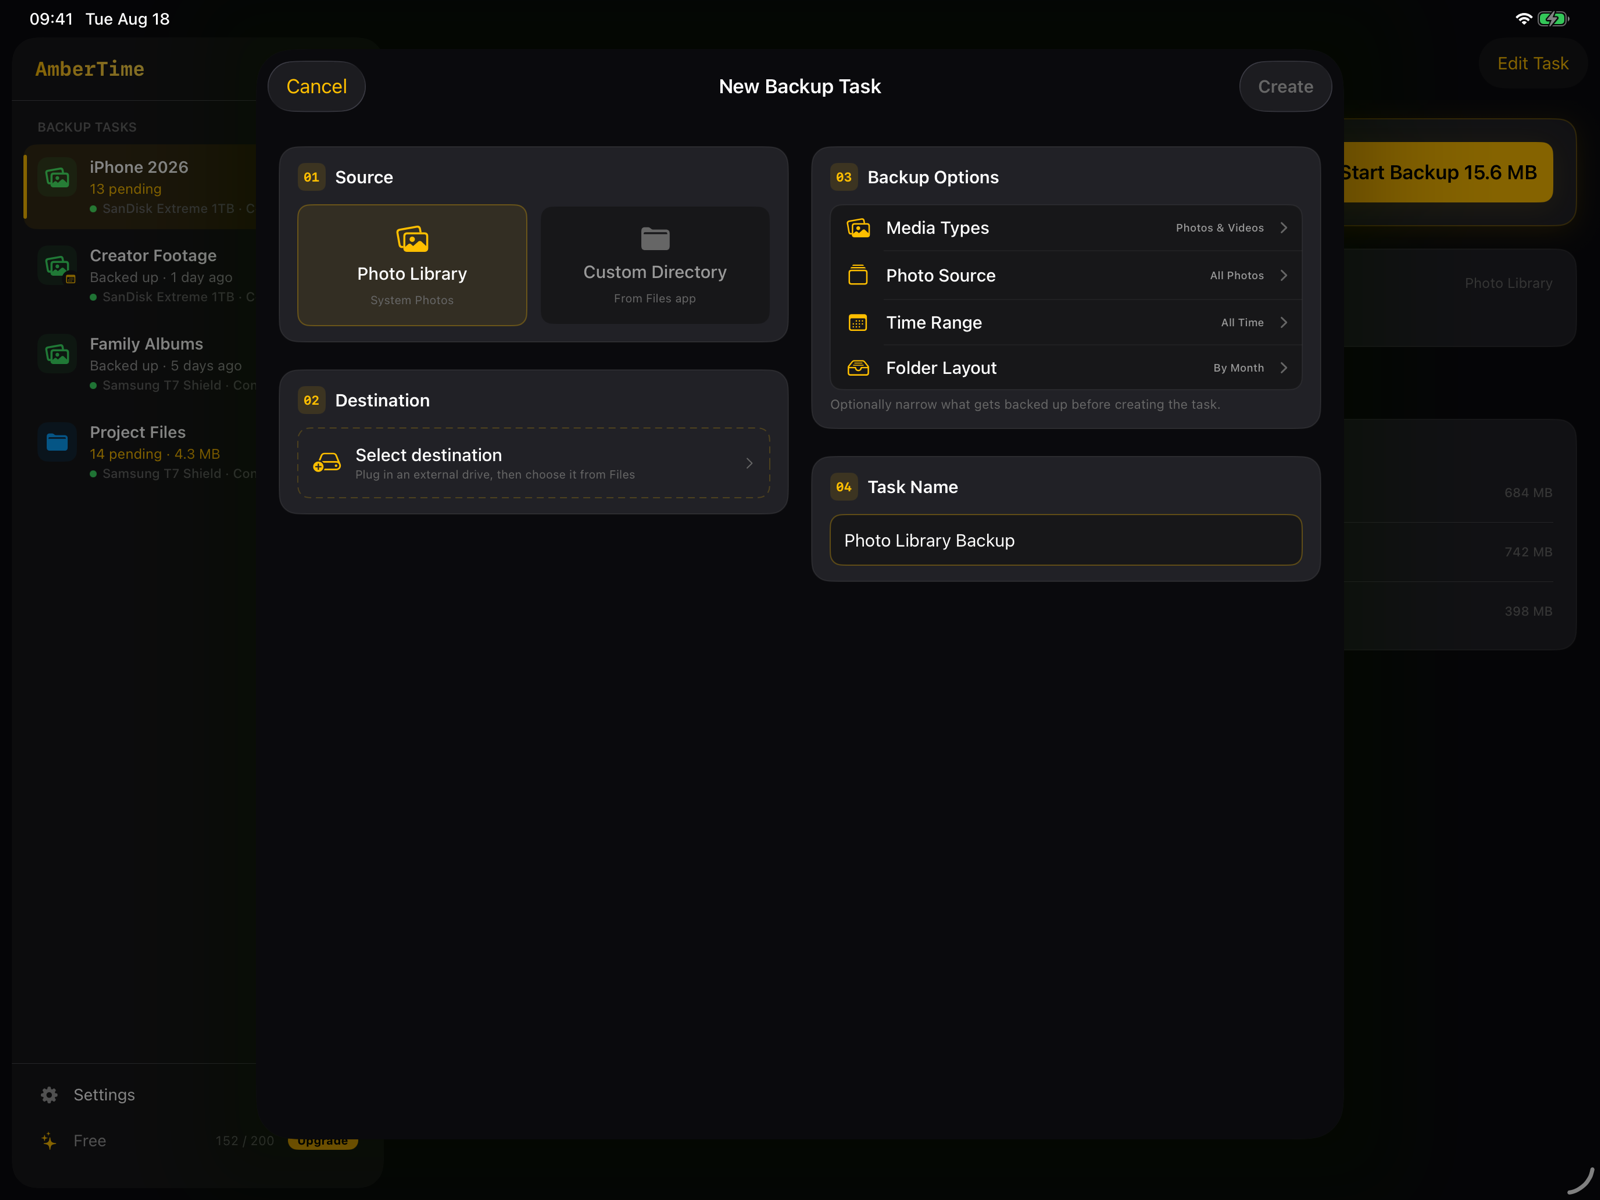
Creating a backup task on iPad: pick the source, pick a destination folder on the drive, then narrow the media types, photo source, time range, and folder layout if you want to. -
Select the destination folder
Tap Select destination and choose a folder on the connected drive. AmberTime blocks iPad local storage and iCloud Drive as destinations — the point of the backup is a second copy on physical storage you can unplug and put away.
-
Scan, then start the backup
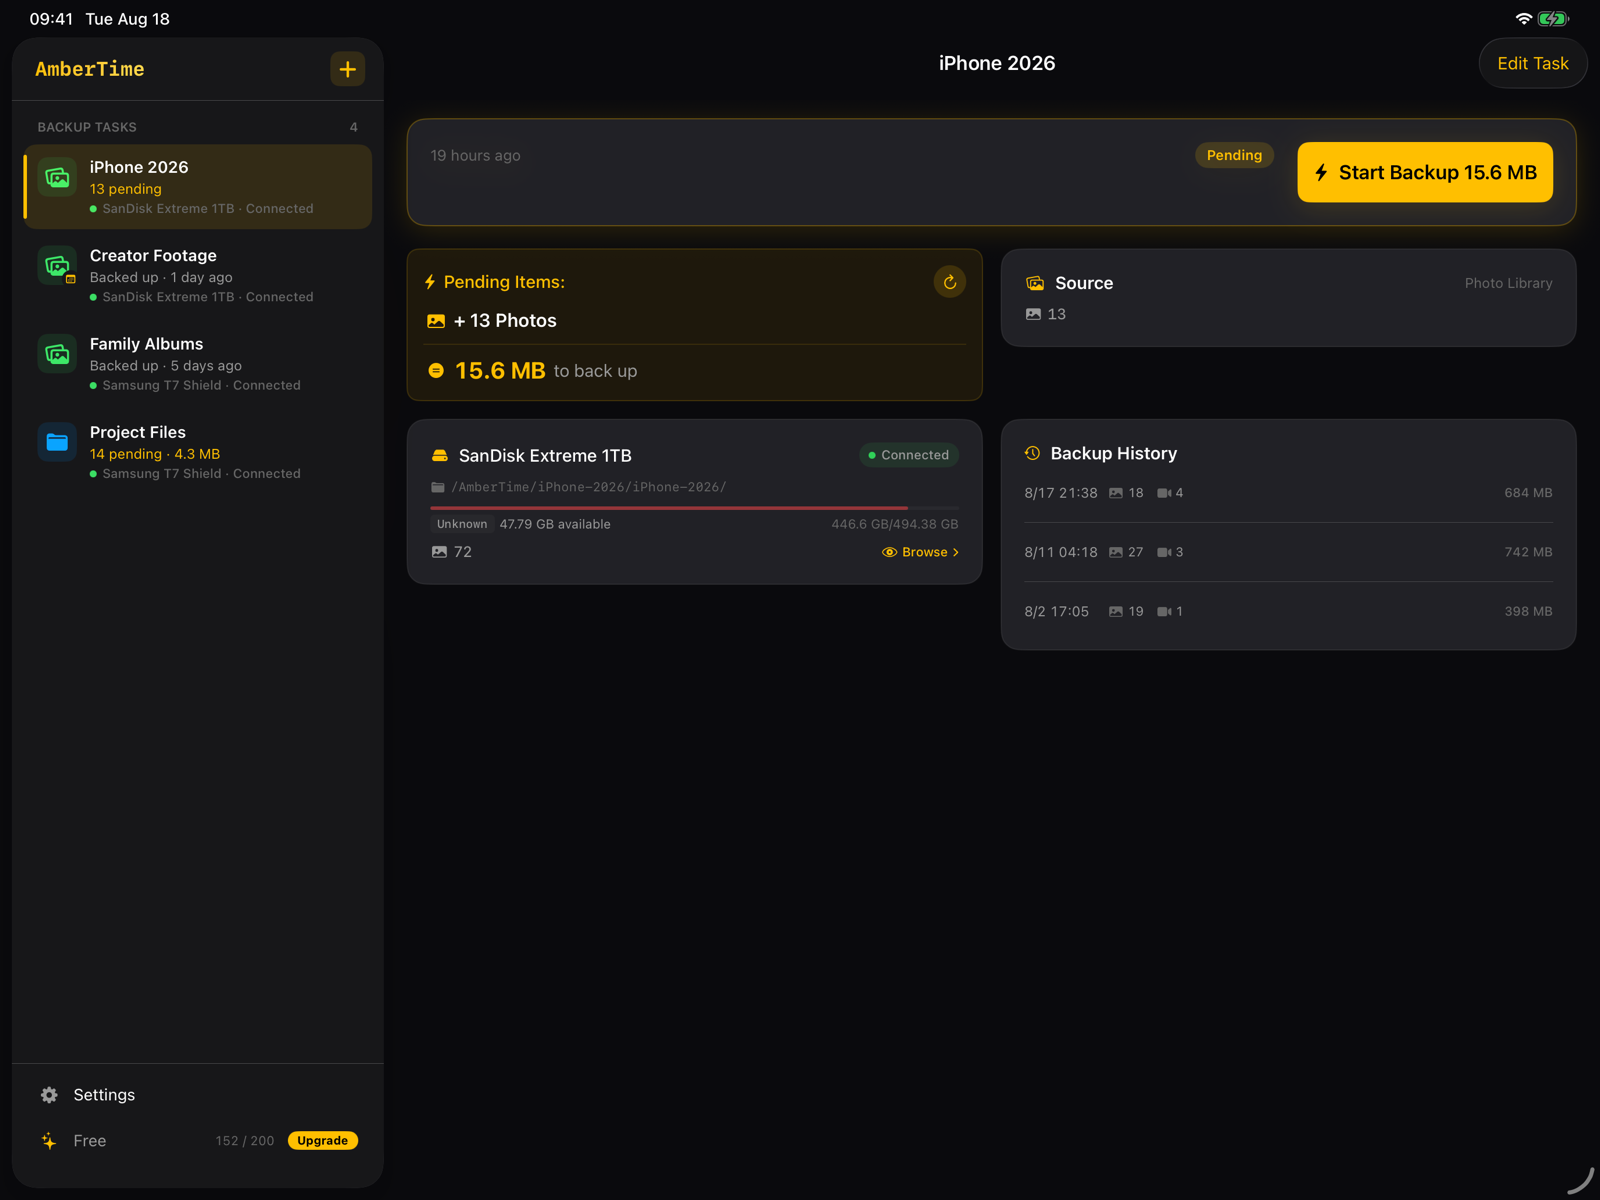
AmberTime scans the source, compares it against its backup record, and shows exactly what is new and how large the transfer will be. Start the task and files stream to the drive in small chunks, each one finalized after it is fully written.
-
Run it again next time
Reconnect the drive weeks later and run the same task again. Items already recorded as backed up are skipped, so a repeat backup only moves what the iPad has added since. Backed-up originals sit in plain folders that any computer can read.
What the iPad app gives you
AmberTime 1.2.0 is a native iPad app, not a scaled-up iPhone layout. At regular widths it uses a sidebar and detail split: every backup task stays visible in the sidebar while the selected task's drive, pending items, and history fill the pane beside it.
- All four orientations. The iPad layout works in landscape and portrait, so a keyboard case or a stand does not force you to rotate.
- Multitasking. Split View and Slide Over are supported. In narrow multitasking widths — Slide Over, a one-third Split View, or a small Stage Manager window — the interface falls back to the compact tab layout used on iPhone rather than squeezing two columns into the space.
- Same engine. The incremental engine, Live Photos handling, metadata preservation, date-range tasks, and album selection all behave exactly as they do on iPhone.
Keyboard shortcuts
With a Magic Keyboard, Smart Keyboard, or any Bluetooth keyboard attached, the whole backup flow can be driven without touching the screen.
| Shortcut | Action |
|---|---|
| ⌘N | New backup task |
| ⇧⌘B | Start or stop the backup for the selected task |
| ⌘R | Rescan the selected task for new items |
| ⌘↑ / ⌘↓ | Move between tasks in the sidebar |
| ⌘⌫ | Delete the selected task (not available while it is running) |
| ⌘, | Open Settings |
Photos and Files folders on the same drive
An iPad is often the device where scans, downloads, and project media pile up outside the Photo Library. AmberTime treats those as separate backup tasks pointed at the same drive: one task for the Photo Library, another for a Files folder, each with its own record of what has been copied.
That keeps the archive readable when you plug the drive into a computer later, and it lets you re-run just the task that changed. See backing up Files folders to an SSD for how folder tasks behave.
What about iCloud-only photos?
If "Optimize iPad Storage" is on, the iPad may hold only a lightweight version of an original while the full-resolution file stays in iCloud. AmberTime can include those iCloud-only originals when you choose that option, but it has to fetch each full-resolution original from Apple before writing it to the drive.
That download needs network access and takes time on a large library. AmberTime still does not upload your files to AmberTime servers, and the final file is written locally to your drive. See backing up iCloud-only photos.
Troubleshooting
The drive does not appear in Files
Check the drive in the Files app first. On a Lightning iPad, confirm you are using a Lightning to USB 3 Camera Adapter with power connected — the plain Lightning to USB adapter is not enough for most drives. On USB-C, try a different cable, then a powered hub. Also confirm the drive is formatted APFS, exFAT, or FAT32; iPadOS does not mount NTFS or ext4 volumes. More in USB drive not detected.
The drive disconnects partway through
This is usually power, not the app. Use a powered hub for bus-powered SSDs. Completed files are already recorded, so reconnect the drive and run the task again to continue with what is left.
A large video is skipped
FAT32 cannot store a single file larger than 4 GB. Reformat the drive as exFAT or APFS for long 4K, ProRes, or drone footage.
The layout looks like the iPhone version
That is the compact fallback. It appears in Slide Over, a one-third Split View, or a small Stage Manager window. Widen the window and the sidebar and detail layout returns.
FAQ
Do I need a Mac or PC anywhere in this?
No. The scan and the transfer both run on the iPad, and the destination is a drive attached to the iPad. A computer is only useful afterwards, if you want to read the archive on a bigger screen.
Do I have to buy the app again for iPad?
No. AmberTime is one universal app for iPhone and iPad, and the one-time lifetime Pro unlock is tied to your Apple Account, so it carries across your devices.
Can I back up an iPad and an iPhone to the same drive?
Yes. Create a task on each device pointed at its own folder on the drive. Each task keeps its own backup record, so the two devices do not interfere with each other.
Are photos deleted from the iPad after backup?
No. AmberTime never deletes source photos, videos, or folders. Freeing up space stays a manual choice you make after verifying the archive.
Does AmberTime compress or convert anything?
No. It writes original resources where iPadOS exposes them, and Live Photos are written as paired photo and video files.